Our Plumbing Heating System
We purchased our 2017 Pleasure-Way Lexor TS in Florida in early February. As we headed home to Virginia we realized that our time of enjoying a fully functioning vehicle was running short. Temperatures in Virginia often drop below freezing in the winter and our plumbing system was not designed to operate at sustained temperatures below freezing. I decided that I didn’t want “winterization” to be a part of my ownership experience so I got to work on a solution.
I found that there were two major sources for plumbing heating components. One was a company named Ultraheat and the other was Facon. I ordered some of both pads to compare them. The Ultraheat pads were much more expensive and came with a lifetime warranty. The Facon pads came with a two year warranty. It was quite obvious that the Ultraheat pads were of better quality. Their connecting wires, adhesive, thermostats and resistive components were more robust. Ultraheat also had informed helpful folks you could speak to and correspond with. My test queries to Facon were met with late and uninformed responses. I decided to proceed with the Ultraheat pads.
I also decided to insulate the tanks and the pipes. I ordered 1/4″ adhesive-backed neoprene sheets for the tanks and 1/2″ EPDM pipe insulation for the pipes. The neoprene and EPDM cost a bit more than the aluminum and open cell foam alternatives but it was designed for outdoor use in wet environments so it was the better choice. The insulation is still in great shape after seven years.
Another element of the design that I determined to be important was the control system. I could envision situations where I might only want certain parts of the system to be active. I divided the initial system up in to four zones, the fresh water tank, the grey water tank, the fresh water plumbing and the waste lines. The black water tank was inside the vehicle and I would be heating its drain line so I didn’t set up a zone for it.
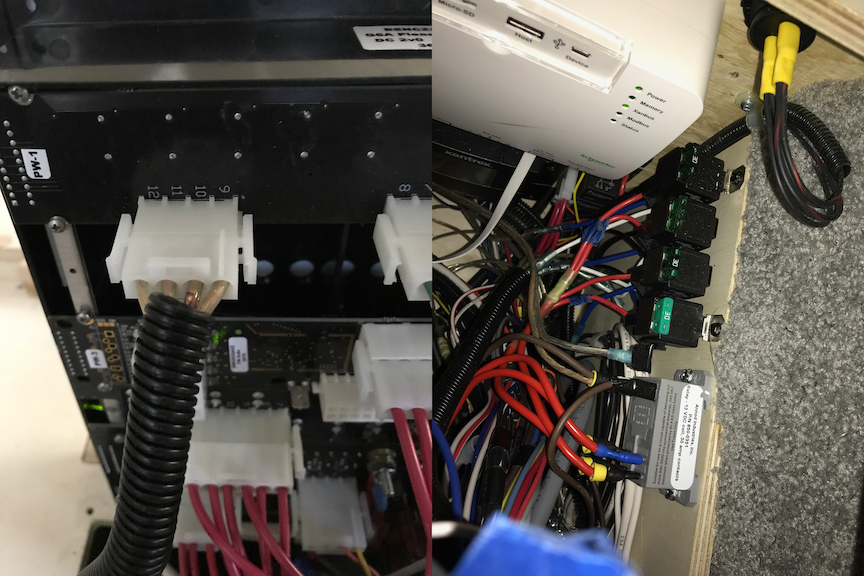
I ordered a panel from Spyder controls that would use some unused outputs (pins 9-12) on our multiplex board to control the zones. By using the multiplex system I was able to keep all of the heavy DC wiring inside the driver’s side ottoman and run a light 20 AWG network cable to the panel that I located in the overhead cabinet by the sliding door. This setup also ultimately allowed me to control the zones through the Coachproxy automation system.
The first step was to thoroughly clean off the tanks and plumbing components with detergent and then isopropyl alcohol to ensure that the pads would adhere well. I adhered the pads to the tanks and then adhered the pipe heaters at 12″ intervals along the accessible freshwater PEX, ABS and PVC drain lines.
The line from the fresh water tank to the pump was made from a clear vinyl which would not withstand the heat from a pad so I built a PEX insert for the line and adhered a pad to it.
Fresh Water Line Before Insulation
After all the pads were in place I used some 14 AWG two-lead strip wire to connect the pads in each zone in parallel. I found that there was plenty of extra room in the hole that already existed for the generator harness but decided to use a step bit to create a new dedicated 1.5 inch diameter hole in the driver’s side ottoman floor. I painted the hole edges with Por-15. I then inserted a grommet to protect the wires that would pass through the hole. I deliberately oversized this hole a bit to leave room for future use. The power cable on each fused relay was connected to a bus bar that was then connected to the house battery with an 8 AWG cable. The ground cable on each relay was connected to the stock ground bar in the ottoman. The activation lead on each relay was connected to its assigned pin on the multiplex board and the power lead on each relay was connected to its assigned pads.
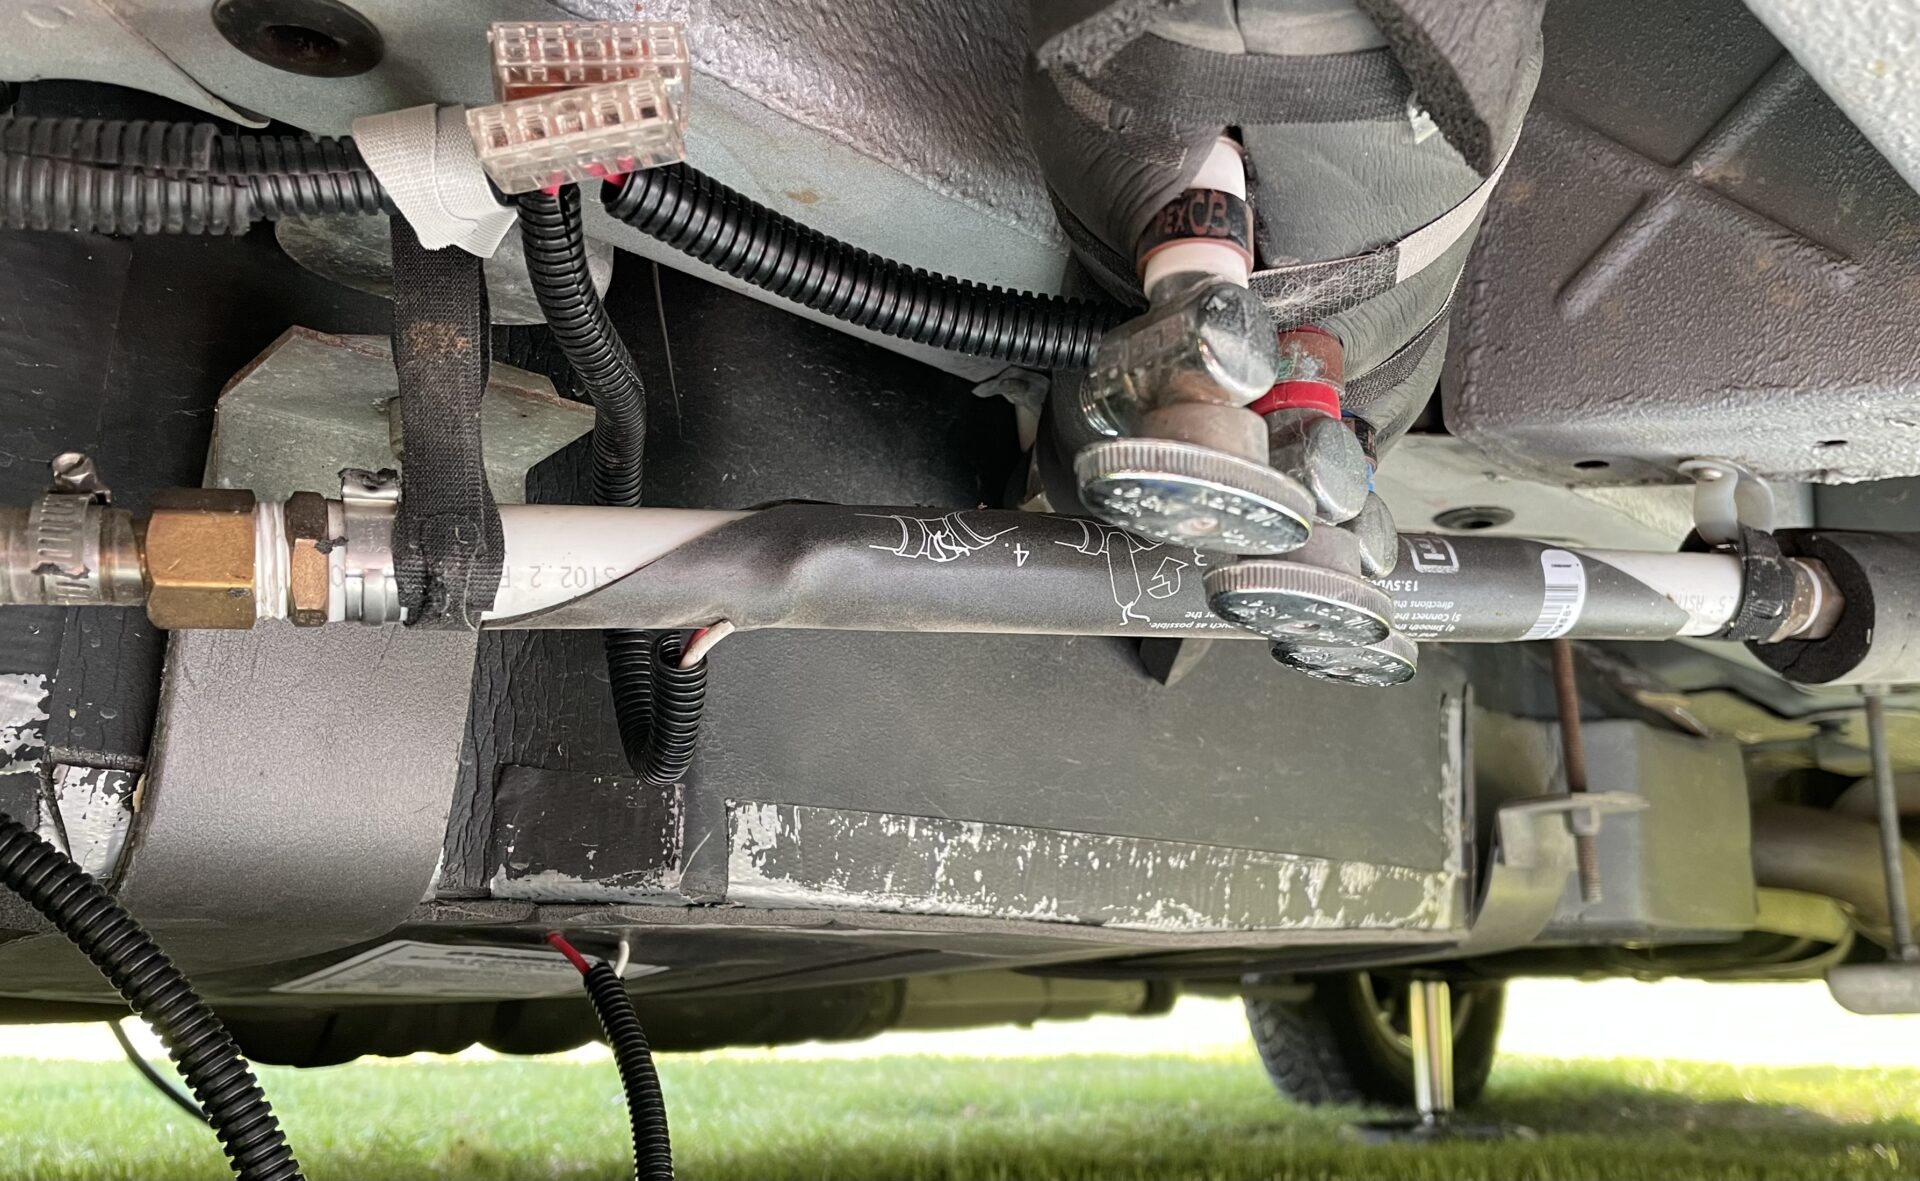
After completing the wiring I protected each run with appropriately sized split loom covering and secured it with Velcro straps to components under the van. I then sealed the 1.5″ hole in the floor with clear GE silicone 2.
The next step was to insulate the components. I carefully cut the neoprene sheets and adhered it to the sides and bottom of each tank. I then wrapped the plumbing lines with the appropriate neoprene pipe insulation and used weatherproof duct tape to form the odd shaped pieces. I decided to secure the pipe insulation with Velcro straps instead of taping it closed. That decision has made it much easier to maintain the system.
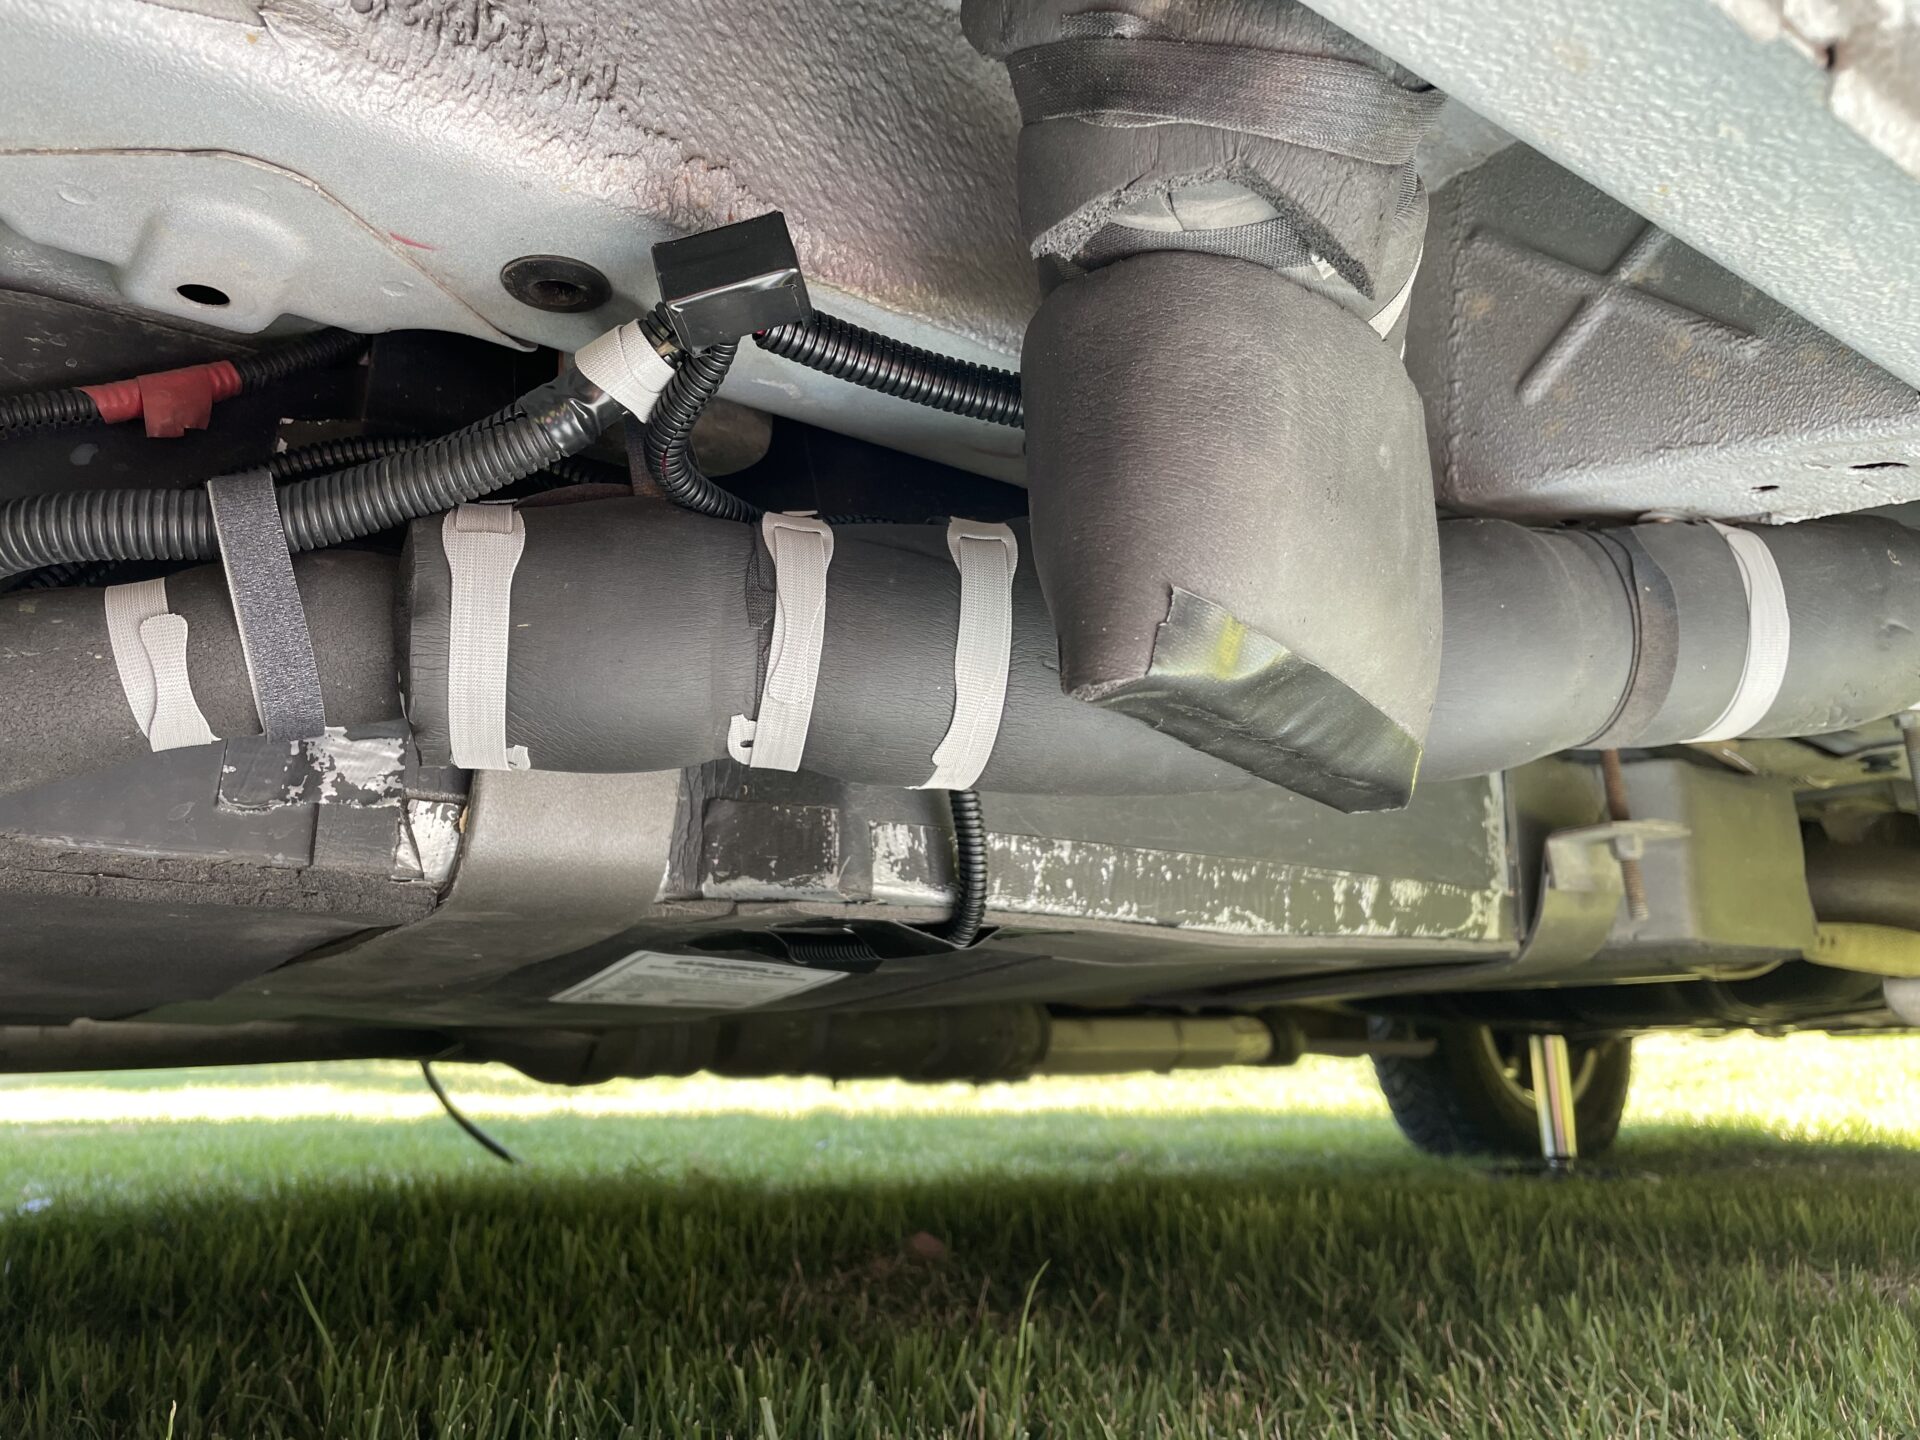
Fresh Water Line After Insulation Installed
I was unable to easily heat and insulate the outside shower lines but I found that they ran under the “shelf” along the wall in the bathroom. I removed that shelf, rerouted the plumbing and installed some easy to access valves under the bathroom sink. I can now turn the lines off and open the taps on the outside faucet to drain the water from the lines. While that shelf was off I also took the opportunity to add some 3M Thinsulate insulation along the exterior wall behind the pipes.
A key element in the design is the built-in low temperature capability of the Truma AquaGo Comfort Plus heater. It has a warm water recirculation system that protects the heater itself and also heats some sections of the fresh water piping. The system uses very little propane when running and you can purchase a DC kit that allows the system to operate on 12V power. The DC kit works well but a vent cover needs to be removed before you can use the hot water.
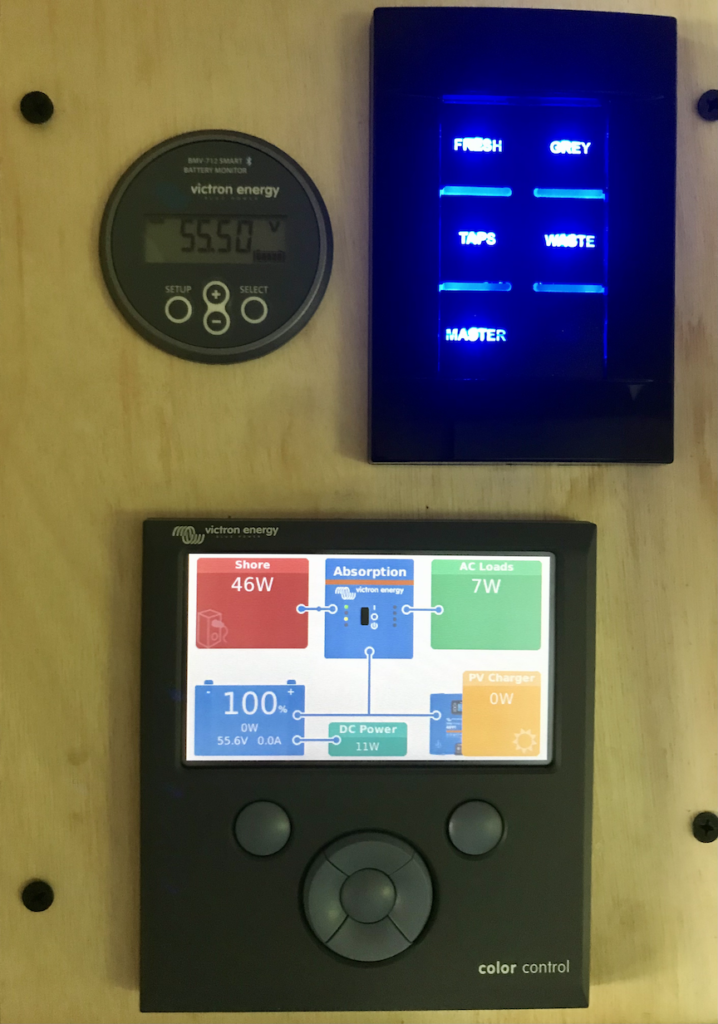
Our plumbing heating system draws about 32 amps with all zones on. We rarely have all the zones activated as the tanks are much less sensitive to cold than the plumbing. It’s also quite easy to just add a little RV plumbing antifreeze to the tanks to protect them too.
We have never winterized our vehicle. We’ve experienced temperatures in single digits on the Fahrenheit scale with all systems running and nothing has been damaged. Winter camping without compromise has become one of our favorite activities.
Since the initial installation I have added another “zone” that controls the waste gates. The gate heater is not supposed to be left on. It’s designed to thaw the gate for dumping and then it should be turned off. I installed a timer on the zone through our Coachproxy automation system to make sure it would turn off after 5 minutes. The automation system also responds to ambient air temperature changes through an outside Ruuvi temperature sensor. It will turn the entire plumbing heating system on or off and send me an alert that it’s done so.
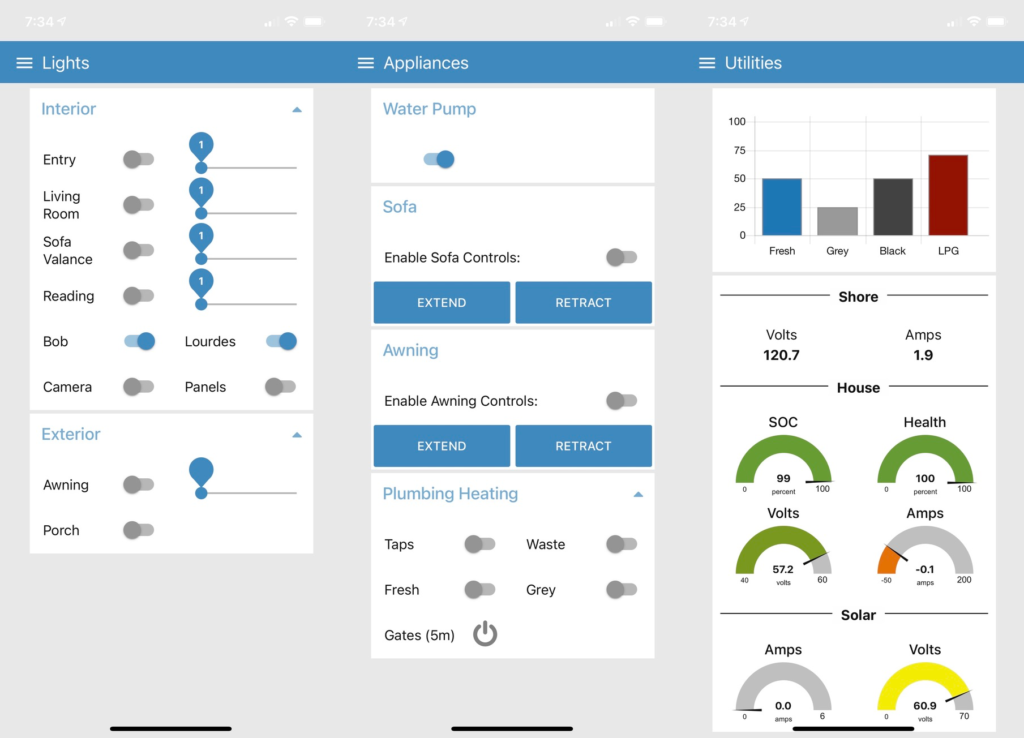
iPhone Screenshots of the Coachproxy Application.
The diagram below shows the the layout of the system “zones” under the van.

Here are some of the items that I used on the project:
Victron BMV-712 Battery Monitor
2 ea – Ultraheat 1.5″ Pipe Elbow Heater
8 ea – Ultraheat 3″ Pipe Elbow Heater
1 ea – Ultraheat 1/2″ Water Line Heater
2ea – 1/4″ Neoprene Adhesive Sheets
Hi Bob, I’m thinking about doing something similar to our 2020 Lexor and have some questions about your installation. How did you access the PEX lines where they cross over the top of the gray tank? And how did you deal with the drains from the sink and the shower (install elbow heat pads and then wrap like crazy with neoprene?)? Where did you install the shutoffs to your outdoor shower? I removed the side panel inside the vanity and can see where they go, but if I were somehow to install valves in that location, the cold water valve would cut off water to the toilet.
Hi David,
I modified the plumbing to the shower early on in our ownership while repairing some bad caulk around the box along the bathroom wall. It can be easily removed to provide access to the lines. Once the lines are exposed it’s simple work to run dedicated lines with cutoff valves to the outdoor fixture. It’s also a great opportunity to add some insulation along the outer wall behind the lines. I chose to just cut off the flow due to the limited access but you could also heat the lines while in there if you want the outside fixture to remain functional.
The lines running over the grey tank were protected by using elbow heaters at 6″ intervals and then by covering them with a piece of split neoprene pipe insulation that I slid over them to form a “cup” against he floor. Those lines also have some built-in protection from the circulation feature on the Truma Aqua Go Comfort Plus.
All of the drain lines were protected by elbow heaters at 6″ intervals and then were covered by neoprene pipe insulation.
I decided to use the elbow heaters as opposed to pipe heaters to provide some redundancy in the event a pad failed. I haven’t had any failures in three years but I’m still glad to know there’s a margin for error.
The “zones” are really important to the design to help you manage different situations and also to make it easy to verify that the system is working. After the initial installation of the pads you’ll want to turn the zone on and verify that each pad is working. When you do this pay attention to this baseline amp draw for the zone and mark it down. In the future you’ll be able to use that figure to verify that the pads are still in good shape. If the amp draw is lower than the initial baseline you’ll be able to focus on that zone to find the issue.
I hope this helps!
Bob
Thanks for the quick and thoughtful reply. Hope you will indulge a few more questions:
1) About the elbow pads on the water lines–did you wrap each one individually or as a group (bundling all three and wrapping the heat pads around them)?
2) I am up to installing pads, insulation, and wiring, but messing with the Spyder Panel is more than I want to do. Did you install the relays to make it possible to run small gauge control wires to the Spyder Panel? Would I even need relays if I were to use simple rocker switches along the lines of this: https://www.annodindustries.com/shop/ultraheat-swpk-5-13-5-vdc-system-switch-package.html ?
3) How did you deal with the mess of drain and water lines near the shower trap? Ours is covered with some sort of foil faced foam to protect them from the nearby engine exhaust pipe. From your photos, it looks to me like you basically encased the area in a sort of neoprene “bonnet”. Are there any sort of heat pads in there?
You’re welcome David.
I used 3″ size elbow pads and used them to wrap all three at once.
The relays would be unnecessary when using a standard DC switch panel. The amperage in my set up didn’t really require them either but I just felt it was a better design to draw power directly from the battery instead of from the Spyder board. The decision also turned out to be a good one when I implemented the Coachproxy system as the heating system could be controlled through it too.
I installed pads on the exposed piping and then insulated those areas. I left the area that is covered with the galvanized sheet metal near the muffler as is.
Bob
[…] The batteries arrived in about two weeks. I built a caddy out of plywood to house them. I incorporated a slide out heated panel underneath the batteries and added it as a zone on our plumbing heating system. […]
[…] Place an adhesive backed foam filler or tape over top of the wire to hold it in place. I used a piece of the neoprene insulation that was left over from the plumbing heating system project. […]