Upgrading and Reconfiguring the AC Circuits

For several years now I’ve been running a Victron Quattro Inverter that is capable of handling 30A of AC input and 30A of AC output.   Unfortunately the stock wiring and breakers to and from the inverter were only capable of safely supporting 20A.   To accommodate the stock components  I’ve been programming  the inverter to restrict itself to 20A of AC input and output.

Victron 100/20 MPPT Solar Controller and Quattro 48/3000/50 Inverter/Charger/ATS in Passenger Side Ottoman with 20A Capable 12/2 Romex Wire.

I found a few hours today to remove that bottleneck by upgrading the wiring from 12/2 Romex  to 10/2 Romex and installing breakers rated for 30A.

The Pleasure-Way layout in our 2017 Lexor TS made it easy to access the areas needed to make the changes.

First I disconnected the vehicle from shore power and turned off the inverter.

I then removed the cover from the circuit breaker panel and loosened the power, neutral and ground wires from the breakers.  I inserted a Phillips head screwdriver through the back of the panel next to each wire to “open” the plastic tabs that were “grabbing” them.   I pulled the wires out through the back side of the panel.   I then opened up the junction box near the inverter, loosened the wire clamps, disconnected all of the wires and pulled them free from the box.

Next I cut two pieces of 10/2 Romex that were each  7 feet long and taped them together at 1 foot intervals with electric tape.   I then covered the wires in split loom and taped it together at 1 foot intervals too.   Once the new wires were ready I taped one end to the end of the old wires with some Gorilla tape and fed the new wires under the floor between the ottomans using the old ones  to pull them along.

I fed the new wires through the back of the circuit breaker panel and back in to the junction box.

Rear of Circuit Breaker Panel with new 30A capable 10/2 Romex Wire

Junction Box in Passenger Side Ottoman with 30A Capable 10/2 Romex Wire.

I then cut two more 10/2 wires that were about 5 feet in length and taped them together at 1 foot intervals. I also covered them with 3/4 inch split loom and taped it together at 1 foot intervals.   I once again taped the new wires to the old wires and pulled the the new wires through the bottom of the passenger side ottoman to the back of the inverter.

Circuit Breaker Panel with Cover Removed and new 30A Capable 10/2 Romex Wire in Place.

I then cut the wires to length and connected them to the new 30A breakers, inside the ottoman junction box and at the inverter.

Victron 100/20 MPPT Solar Controller and Quattro 48/3000/50 Inverter/Charger/ATS in Passenger Side Ottoman with 30A Capable 10/2 Romex Wire.

I also repositioned the breakers in the panel.   On the left side which is assigned to Shore power I now have only two breakers.  30A power comes in to the panel through the 30A “Shore Power”  breaker and then goes to the Inverter through the 30A “Inverter Input”  breaker.    All the other breakers are now on the right side of the panel which is assigned to the Inverter Output.  With the added capacity I decided to move the Refrigerator AC power over to the Inverter side of the panel too just to make the AC/DC decision irrelevant to whether or not the refrigerator has power.

I also installed a 15A AFCI/GFCI breaker on the outlet circuit to remove the requirement to have GFCI on the first in circuit ottoman outlet.   Doing so allowed us to install an outlet in that position that supports the charging of our USB devices.

AC Panel with New Circuit Breaker Configuration

AC Panel with New Circuit Breaker Configuration

When we are connected to shore power the inverter’s internal Automatic Transfer Switch (ATS) just passes the power through to the inverter side of the panel.   When we are disconnected from shore power the inverter takes over and provides power from the battery.

Life on the road just got a little simpler.   Everything just works.

Managing Rust

Every few months I inspect the chassis to make sure that all is well.

During my most recent inspection I noticed a little bit of rust developing on one of the seatbelt washers in the trunk.   When I looked beneath the trunk the bottom of the bolt had some rust too.  

I ordered the following parts and replaced the old hardware today.   

1/2-13 x 2-1/2″ 304 Stainless Steel Hex Head Cap Screw Bolts

1/2-13 316 Stainless Steel Nylon Insert Lock Nuts

1/2″-1-1/4″ OD 304 Stainless Washer

POR-15 45009 Gloss Black Super Starter Kit

Loctite 504469 Silver-Grade Anti-Seize Stick

After removing the old hardware I cleaned the hole with POR 15 cleaner and painted it with POR 15.   I also did the same to the edges of the brace under the floor which had started to show signs of rust.   

When working with stainless steel bolts and nuts it’s important to use an anti-seize lubricant and/or different grades of stainless to avoid having the parts seize.  I ordered the bolts and washers in 304 grade and the nuts in 316 grade.   I also applied lubricant.   

The new hardware was easy to install and looks much better.   

To date I’ve used stainless steel parts to replace the bolts that hold the sofa frame to the floor,  the bolts that hold the hitch to the frame and a number of other screws and fasteners.  I’ve also touched up a number of other fixed items with POR 15. In the image above you can see one of the self-tapping screws that’s been treated at the bottom of the image.  One day I hope to look at the vehicle and see nothing to do.  Until then I’ll keep chipping away at it!

Adding Awning Supports to Our Carefree Freestyle Awning

The Carefree Freestyle awning on our 2017 Pleasure-Way Lexor TS is very  convenient to extend and retract.   It’s nice to be able to get a little quick shade without any effort or having to deploy supports.

There are times, however, when that convenience becomes a liability. The wind can quickly become your enemy.  The motion sensitive automatic retraction mechanism seems to be either too fast or too slow to do its job. I found a number of situations where I wanted more control.

Power Control

Having the ability to disable the power to the awning is very important is very important with this upgrade.   You don’t want the awning to retract with the poles in place.

Our 2017 Pleasure-Way Lexor TS came equipped with three awning-related switches by the sliding door. The first switch retracts and extends the awning.   The second is a power switch that disables the motor and wind sensor retraction mechanism.  The third switch controls the awning lights.

In an earlier project I had swapped out the stock power button with  a lighted button.  It makes it easier to see when the power is on.  I also replaced the awning light switch with one that included a dimmer. I also covered the awning extend/retract and power buttons with a flip up cover to avoid accidentally bumping in them.    You may read more about that project by clicking here.

Support

The goal of this project was to provide support to the outer edge of the awning and prevent it from being pushed down or lifted up by the wind.

I had some trifold poles on hand that we used with the awning on our VW Camper.  The poles adjust from 80 to 96 inches and break down to a length of 29 inches. Their height adjustment mechanism is a very solid pin and hole lock design which is more reliable than the twist or cam friction-based mechanisms.  The poles we had were made by Kelty and don’t seem to be available at the moment. The ones at the link below from another vendor look almost identical. I’ve also seen similar poles at my local REI outlet.

The poles each have a 2 inch long 1/4 inch pin at the top that is designed for use with the grommets found on tents and tarps.   To take advantage of those posts I drilled (from the bottom up) a 3/8 inch hole located one inch from the edge on each end of the awning.

Bottom View of Tent Pole Installed in New Hole on Awning

The pin at the top of the poles are inserted in the new holes and the poles are adjusted to the height required by the terrain.   After adjusting the poles we then loop one end of a piece of parachute cord over the top of the pin and stake the other end of the cord to the ground and tighten it up with some guy line adjusters.

Top View of Tent Pole Installed in New Hole on Awning

The supports take just a few minutes to set up and tear down.  The awning is very secure and we can now enjoy it’s shade along with a nice breeze too!

Our Awning Deployed While Flags are Flying Straight Out at Floydfest 21

Here are some of the items that I used on the project.

Our Bathroom Faucet Fix

The bathroom faucet on our 2017 Lexor TS worked but there was room for improvement.  It was a standard plastic RV diverter faucet that allowed very little clearance from the edge and bottom of the sink. It also had separate handles for hot and cold water.

The search for a replacement was harder than I thought it would be. A brass diverter faucet with a single handle  didn’t exist.  I finally came across the fixture below on an obscure European boutique plumbing site and realized that its design would provide the flexibility to cobble together exactly what I envisioned.  I then found a better value on the same item at AliExpress.

We had previously replaced our bathroom cabinet with a larger one that left about nine inches of clearance between its base and the countertop. As you can see above the spout that came with the fixture was not ideal for the space.

I removed the fixture’s original spout and replaced it with a 6″ utility sink spout that could move freely in the space and also reach the rear center of the sink.  I then added a swivel aerator to finish it off.

We rarely used to use the bathroom sink for anything other than testing the shower water before pulling the diverter.   With the new faucet we are now using it all the time.  The kitchen sink has a little less congestion and our little Class B feels like it has a bit more room.

While I was working on the faucet I also took the time to fix a few other items.

The chrome plated plastic drain had definitely seen better days.  I replaced the drain with a new chrome plated metal unit that has a much better basket and stopper mechanism.   Replacing the drain was very simple as all of the components were hand tightened.   The new drain included a couple of gaskets but I decided to use plumber’s putty to get a flusher fit and a better seal.

I also fixed two other items under the sink that would make noise every once in a while.

In the image below you can see the before and after shots of the plumbing lines.   The hot water line was prone to swinging around and thumping against the wall so I wrapped it with some pipe insulation to provide a buffer.

In the video below you can hear how the stock vent cap rattled like a maraca.  I replaced it with a higher quality model.

Here are some of the items that I used on the project:

Bathroom Basin Faucet

Project Source Utility Faucet

Water Nymph Swivel Aerator

PVC Riser Extender

Bathroom Sink Drain

Plumber’s Putty

1/2″ Pipe Insulation

Oatey 1.5″ Vent Cap

RAM Promaster Audio System Installation

Dash Layout Before and After the Installation

The standard  Uconnect head unit on our RAM Promaster based Pleasure-Way RV left a lot to be desired. It had poor audio quality and its built-in navigation system was inaccurate, slow and difficult to program.  I also felt like I needed to learn Klingon to use its built-in voice command system.

I had found a way to enhance the navigation capabilities by docking an iPad in our new Dash Clipboard Replacement but the other issues were still present so I started to research alternatives.

Front and Back of the Original Head Unit

The stock unit interacted with controls on the steering wheel and was integrated in to the vehicle’s CANBUS. It was the only interface to control a number of items like lights, heated seats and locking options.  It was important  to retain these functions during the upgrade process.

I turned to Crutchfield to start researching my options.    Crutchfield is usually a great resource to determine what components will work well in a particular vehicle.   In this case they were not.   They simply had no clue how the dashboard was organized on a 2016 RAM Promaster and did not understand what type of connections were present on the back of the stock radio.   They also did not have any accurate advice on how to retain the CANBUS and steering wheel controls.

I hopped on the Internet to find and order the correct adapters to fit the harness, antennas and USB port.   I found that most of the items were designed to fit a Fiat sound system.  My research had determined that a device named the iDatalink Maestro ADS-MRR Interface Module with an iDatalink HRN-RR-CH3 Factory Integration Adapter would preserve the CANBUS controls and steering wheel functions. I decided to pair that up with a Pioneer AVH-2330NEX head unit.  The project also required a Metra 95-6523 Dash Kit to secure and finish the installation.

For the door and A-pillar speakers I decided on a set of Infinity Kappa 60csx component speakers and some Metra 71-017C Speaker Wiring Harnesses.  To improve the bass I decided to add a Pioneer TS-WX130DA Compact Active subwoofer under the passenger seat.

Installing the Head Unit

Removing the original unit was made easy by using the Metra Radio Removal Tools.  The tools were inserted in the holes on the left and right side of the head unit to unlock it.  The unit just slid right out.

I also removed the two lower dash panels to get easier access to everything.  Both covers were held in place with just a few easy to access screws.

After disconnecting the cables from the rear of the unit I connected the various adapters to the original harness, usb and antenna connections.

Rear View of the Original Head Unit with Cables

I programmed the Maestro to let it know which head unit and vehicle it would be attached to.  I then wired the iDatalink CH3 harness adapter to the Pioneer’s harness and connected the Maestro. The instructions provided by both the Pioneer and Maestro manuals were easy to follow.

Maestro RR Unit with Connections

Rear view of Pioneer 2330NEX and Maestro RR Harness

Once the programming and cabling was complete it was time to organize and place the Maestro and wiring in the dash.  There was plenty of room to store it away and then slide the stereo into place.  The last step was to snap the Metra trim in to place.

The head unit fired right up and the Maestro was doing its job well.   The steering wheel controls were all responding and all of the former stock CANBUS settings were available.  It was a nice surprise to discover that the Maestro had also unlocked several new gauges and a tire pressure display.

New ECU Features Provided by Maestro RR Interface

Installing the Speakers

I then moved on to installing the speakers.   The Infinity component system was comprised of a 6 1/2 inch woofer for the door and a 3/4 inch tweeter for the A-pillar.   It also included a crossover to distribute the proper frequencies to each speaker.

The door speakers were easy to access and remove.   The round OEM  cover just popped off with a little bit of pressure from a nylon spludge at the edge.  While the speaker was out I adhered some neoprene insulation to the interior of the door behind the speaker to provide some dampening.

I then removed the A-pillar covers using the technique below.

  1. Using a nylon spludge or equivalent, gently unclip the A-pillar trim from the body, do not try to remove.
  2. Push the A-Pillar trim down at the same angle as the windshield pillar and disengage the top of the A-pillar trim from the headline.
  3. Disconnect the tether clip and disconnect the speaker electrical connector.

I ran a speaker wire through the rubber door harness cover and in to the dash area through the access points shown below and then ran the wires up the sides of the dash to the A-pillar area.

Speaker Wire Access Path from Dash to Doors

I removed the OEM tweeters and connected the component tweeters to the new wires and then hot-glued them in to position. This step was a lot easier than it sounds.  It just took a couple of dabs of glue to hold each tweeter in place.

I then connected the original door speaker wire, the new component woofer and tweeter wires to the crossovers modules.  I used industrial strength Velcro to mount the crossovers inside the doors just forward of the speaker hole.   There was plenty of space and a nice flat area to secure them.

One of the included adapters made it fairly easy to mount the new door speakers.    I did have to drill one additional hole in one of the adapters to match it up with the pre-existing screw holes in the door.

I turned on the head unit to test the system. The clarity and depth of the sound was  significantly improved.  It was now time to move on to the subwoofer installation to bring out the bass.

Installing the Subwoofer

I removed the passenger seat with the following procedure.

  1. Remove the battery cover from the floor.
  2. Disconnect the negative battery cable.
  3. Wait 30 minutes to discharge the air bag system.  This is a necessary precaution as there is an air bag in the side of the seat.
  4. Remove the covers at the front and rear of the seat.
  5. Remove the  two floor bolts at the front of the seat.
  6. Slide the seat forward off the rear pins.
  7. Disconnect the wiring harnesses.

With clear access to the floor I used industrial Velcro to secure the the subwoofer.  The wires were easy to  feed under the floor covering over to the battery box in the floor and then up through the console to the area behind the head unit.   I found a free terminal on the battery’s fuse harness that I used to power the unit.  The remaining wires each had a ready spot to connect on the head unit.  The subwoofer had a remote control that I decided to adhere to the seat base  on the aisle side of the pedestal.

I also took time at this stage to cover all of the subwoofer and any other OEM harness wires that were running under the floor cover with split loom covering to give them more protection.

Pioneer TS-WX130DA Subwoofer Under Passenger Seat

I replaced the seat by reversing the procedure above.

I reinstalled the A-pillars covers by following the procedure below.

  1. Position the lower end of the A-pillar trim in the instrument panel.
  2. Connect the speaker electrical connector and install the tether into the A-pillar trim until the clip engages.
  3. Push the A-pillar trim down at the same angle as windshield pillar and engage the top of the A-pillar trim with the headliner.
  4. Position the A-pillar trim over the retaining clips and firmly snap it into place.

I replaced the lower dash panels and speaker covers and was ready to tune the system.

After a few moments of adjustment the system was all set.  The effort was well worth it.  The system was performing well and it sounded great!

A post on Part 2 of the audio system improvements will be along soon ….

Here are some of the parts and tools that I used on the project.

Pioneer AVH-2330NEX head unit.  I’m not providing a link as the available lineup changes.  Be sure to make sure that the unit you select is on iDataLink’s list of units that are compatible with the Maestro interface that you select.

iDatalink Maestro ADS-MRR Interface Module   (There is a new RR2 unit available that offers some additional capability)

iDatalink HRN-RR-CH3 Factory Integration Adapter

Metra 95-6523 Dash Kit Promaster Van Kit 14-up, DD

Radio Antenna Adapter Cable Fakra Z Male to DIN

USB 2.0 Male to USB Mini Female Adapter

Infinity Kappa 60csx speakers.  These speakers are no longer available. Crutchfield is a great resource to select a set of speakers with the attributes that fit your music preferences.

Metra 71-017C Speaker Wiring Harnesses

Pioneer TS-WX130DA Compact Active subwoofer

Metra Radio Removal Tools

Nylon Spludge Set

Sponge Neoprene with Adhesive 1/4″ Thick X 39″ Long X 9″ Wide

Industrial Strength Velcro

Split Loom Covering

Marine Heat Shrink Butt Connectors

Hot Melt Glue Gun

Wire Crimper and Cutter

Our Plumbing Heating System

We purchased our Pleasure-Way 2017 Lexor TS in Florida in early February. As we headed home toward Virginia we realized that our time of enjoying a fully functioning vehicle was running short.   Temperatures in Virginia often drop below freezing in the winter and our plumbing system was not designed to operate at sustained temperatures below freezing.   I decided that I didn’t want that thing called “winterization” to be any part of my ownership experience so I got to work on a solution.

I found that there were two major sources for plumbing heating components. One was a company named Ultraheat and the other was Facon.  I ordered some of both pads to compare them. The Ultraheat pads were much more expensive and came with a lifetime warranty.   The Facon pads came with a two year warranty.    It was quite obvious that the Ultraheat pads were of better quality.  Their connecting wires, adhesive, thermostats and resistive components were more robust.  Ultraheat also had informed helpful folks you could speak to and correspond with.  My test queries to Facon were met with late and uninformed responses.  I decided to proceed with the Ultraheat pads.

I also decided to insulate the tanks and the pipes. I ordered 1/4″ adhesive-backed neoprene sheets for the tanks and 1/2″ EPDM pipe insulation for the plumbing. The neoprene and EPDM cost a bit more than the aluminum and open cell foam alternatives but it was designed for outdoor use in wet environments so it seemed to be the better choice.  The insulation is still in great shape after four years.

Another element of the design that I determined to be important was the control system. I could envision situations where I might only want certain parts of the system to be active. I divided the initial system up in to four zones, the fresh water tank, the grey water tank, the fresh water plumbing and the waste lines. The black water tank was inside the vehicle and I would be heating its drain line so I didn’t set up a zone for it.

I ordered a panel from Spyder controls that would use some unused outputs (pins 9-12) on our multiplex board to control the zones.   A traditional DC switch panel would have also worked but I wanted to place the control panel in a location where it was inconvenient to run 5 pairs of 14 AWG strip wire.  By using the multiplex system I was able to keep all of the heavy DC  current wiring inside the driver’s side ottoman and run a light 20 AWG  network cable to the panel that I located in the overhead cabinet by the sliding door.   This setup also ultimately allowed me to control the zones through the Coachproxy automation system.

The first step was to thoroughly clean off the tanks and plumbing components with detergent and then isopropyl alcohol to ensure that the pads would adhere well. I adhered the pads to the tanks and then adhered the pipe heaters at 12″ intervals along the accessible freshwater PEX and ABS and PVC drain lines.

The line from the fresh water tank to the pump was made from a clear vinyl which would not withstand the heat from a pad so I built a PEX insert for the line and adhered a pad to it.

Fresh Water Line Before Insulation

After all the pads were in place I used some 14 AWG two-lead strip wire to connect the pads in each zone in parallel.  I found that there was plenty of extra room in the hole that already existed for the generator harness but decided to use a step bit to create a new dedicated 1.5 inch diameter hole in the driver’s side ottoman floor.  I painted the hole edges with Por-15.  I then inserted a grommet to protect the wires that would pass through the hole.  I deliberately oversized this hole a bit to leave room for future use.   The power cable on each fused relay was connected to a bus bar that was connected to the house battery with an 8 gauge cable. The ground cable on each relay was connected to the stock ground bar in the ottoman. The activation lead on each relay was connected to its assigned pin on the multiplex board and the power lead on each relay was connected to its assigned pads.

After completing the wiring I protected each run with appropriately sized split loom covering and secured it with Velcro straps to components under the van.  I then sealed the 1.5″ hole in the floor with clear GE silicone 2.

The next step was to insulate the components. I carefully cut the neoprene sheets and adhered it to the sides and bottom of each tank. I then wrapped the plumbing lines with the appropriate neoprene pipe insulation and used weatherproof duct tape to form the odd shaped pieces. One key to installing the pipe insulation is to secure it with Velcro straps instead of taping it closed.  Using Velcro strapping will allow you to easily remove the insulation to check the pads and replace them if necessary.

Fresh Water Line After Insulation Installed

I was unable to easily  heat and insulate the outside shower lines but I found that they ran under the “shelf” along the wall in the bathroom.  I removed that shelf, rerouted the plumbing and installed some easy to access valves under the bathroom sink.  I can now turn the lines off and open the taps on the outside faucet to drain the water from the lines.  While that shelf was off I also took the opportunity to add some 3M Thinsulate insulation along the exterior wall behind the pipes.

A key element in the design is the built-in low temperature capability of the Truma AquaGo Comfort Plus heater. It has a warm water recirculation system that protects the heater itself and also heats some sections of the fresh water piping. The system uses very little propane when running and you can purchase a DC kit that allows the system to operate on 12V power.  The DC kit works well but a vent cover needs to be removed before you can use the hot water.

Our plumbing heating system draws about 25 amps with all zones on. We rarely have all the zones activated as the tanks are much less sensitive to cold than the plumbing.  It’s also quite easy to just add a little RV plumbing antifreeze to the tanks to protect them too.

We have never winterized our vehicle. We’ve experienced temperatures in single digits on the Fahrenheit scale with all systems running and nothing has been damaged. Winter camping without compromise has become one of our favorite activities.

Since the initial installation I have added another “zone” that controls the waste gates. The gate heater is not supposed to be left on. It’s designed to thaw the gate for dumping and then it should be turned off.  I installed a timer on the zone through our  Coachproxy automation system  to make sure it would turn off after 5 minutes.  The automation system also responds to ambient air temperature changes through an outside Ruuvi temperature sensor.  It will turn the entire plumbing heating system on or off and send me an alert that it’s done so.

iPhone Screenshots of the Coachproxy Application.

The diagram below shows the the layout of the system “zones” under the van.

System Layout by Zone with Power Requirements

Here are some of the items that I used on the project:

Step Bit

POR-15

Fused Relays

Victron BMV-712 Battery Monitor

2 ea – Ultraheat Tank Heater

2 ea – Ultraheat 1.5″ Pipe Elbow Heater

8 ea – Ultraheat 3″ Pipe Elbow Heater

1 ea – Ultraheat 1/2″ Water Line Heater

2-Lead 12 AWG Strip Wire

Split Loom Tubing

Split Loom Toolset

8 Gauge Wire

Blue Sea Bus Bar

Marine Wire Connectors

Marine Terminals

Velcro Straps

2ea – 1/4″ Neoprene Adhesive Sheets

2ea –  1/2″ EPDM 1.5″ Pipe Insulation

1/2″ EPDM 3″ Pipe Insulation

Duct Tape

3M Thinsulate Acoustic/Thermal Insulation

Bouncing the Bounce with a VB-Air Suspension


The rear sofa seat belts were a feature that we viewed as a real plus when we decided to purchase our 2017 Pleasure-Way Lexor TS. Unfortunately we quickly found out that they were really just safety restraints for an amusement park ride.  While watching our passenger’s get launched in the air each time the vehicle hit a bump was somewhat entertaining we knew something had to be done.  The rear seat was basically unusable while in motion.

I began researching solutions and came across a system named VB-Air that was in wide use in Europe on the Fiat Ducato.   After quite a bit of discussion with the headquarters in the Netherlands  and the U.S. sales representative I was assured  that the system was compatible with our 2016 RAM Promaster chassis.   I contacted  Advanced RV and scheduled the installation for July of 2017.    Three days before my scheduled visit I received a notice that my appointment had been cancelled. VB Air had visited Advanced RV to train them on the installation. During the training they had discovered a change that RAM had made to the rear axle when the vehicle was modified for North America.   The system was not compatible.

I got back on the phone with the U.S. sales representative and he began working  the problem with the engineering team.   In April of 2018 I was notified that the new kit was ready.  I arrived at Advanced RV in the evening on April 30th and settled down for the night in the parking lot with several Advanced RV owners who had service appointments the following day.

Early the following morning Lexi was on the lift. The installation process was very involved and fun to watch.   The system replaced the rear leaf springs and shocks with a completely new active air suspension system that was designed to  add and release air as needed based on changing road conditions.

After the better part of two days Lexi was back on the ground. The handling difference was stunning.   The vehicle felt planted to the road.  Body sway was greatly reduced and the uncontrolled suspension bounce was gone.

I decided to hang around for Advanced RV’s annual fest that was occurring that weekend.  The fest was a wonderful opportunity to meet the Advanced RV team and some of their vendor representatives .   During one of the breakout sessions  my eyes were opened to the advantages of a 48V house system .  My next project was underway!

Curtain Track Hooks

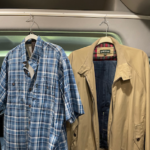
In our 2003 Westfalia camper we had installed some wonderful small hooks at various points around the van that were really handy to hang a towel or clothing from every once in a while.   Our 2017 Lexor  TS had a closet which was nice but not ideal for anything that might need to air out.   We installed some hooks in the bathroom for our towels and washcloths but felt the need for more flexibility.

The track that the cab privacy curtain hung from looked like a great candidate to me. I did a little research to find the nylon glides that held the curtain. I inserted a few of them in to the track and then hung some stainless steel S-hooks from them.

They were perfect for what we had in mind.

When they’re not in use we secure them to the sliding door side of the track by inserting a small rubber bumper.

Here are the items that I used on the project.  I’ve included the track in case your build did not include one from the factory.

Curtain Track

Curtain Track Glides

Stainless Steel S-hooks

Space Saving Hangers

Rubber Bumper

Solar Panel

Building a Solar Panel Rack

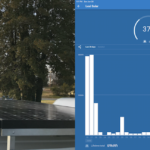
I had just finished installing our new 48V house system and we were leaving in two days for a month long trip to Canada.   The two original and now incompatible 12V solar panels  were still on the roof and had nothing to do.   I had purchased an extra Panasonic 330W 60V panel when I set up the 48V test system in our shed.  I decided it was time to put it to work.

I had one big problem to overcome.  There wasn’t enough space on the roof to mount it.   After staring at it for a while I realized that my only option was to go up.    I decided to build my own mini rack out of off the shelf aluminum stock from Lowes.  I cut the pieces to size on a tabletop compound saw and used 1/4″  aluminum pop rivets for the initial assembly.  I then used aluminum  brazing rods and a MAP torch  to weld the joints together to provide further strength.  This was the first time I had used this  welding  technique. My first few joints didn’t look great but were solid and they started to look better as I went along.

In the image below you can see the new rack wrapping around the old panels.   I left them in place during the build as a ready reference point.   I set the height to  1/4″ above the awning housing to allow the new panel enough horizontal space.

The installation did not require any new holes in the roof.  I attached some Vantech Rack Adapters to the stock Promaster rack mount posts on the driver’s side and then attached the rack to them.   On the passenger side I attached the base of the rack to some existing mount points on the awning base.

I removed the existing panels and patched the existing holes with Clear GE Silicone II.  The two old panels are now on the roof of our “solar shed” and are keeping the  2   100Ah LiFeP04 house batteries in our 2003 VW Camper in good shape.

I attached the panel to the rack with stainless steel bolts and lock washers and connected the cable to the existing harness.   I replaced the inline fuse with a 58V 10A unit and replaced the Victron 100/20-12V solar controller with a Victron MPPT 100/20-48V model.

I finished off the installation by installing a piece of 80/20 aluminum quarter round  across the front of the panel.   I used stainless steel 5/8″ carriage bolts to attach it.

We were pleased with how the installation turned out.  The frame was solid.  The extra space underneath it made it much easier to inspect and clean the roof and  the panel was performing a bit better than its specifications.   On to Canada!

Here are some of the items that I used on the project…..

10″ Compound Mitre Saw

Rivet Gun

MAP Torch Kit

Aluminum Brazing Rods

3 Vantech Promaster Rack Adapters

Victron 100/20-48 Solar Controller

Panasonic HIT-330 Solar Panel

80/20 15 Series Quarter Round

80/20 End Cap with Fastener


Kitchen Faucet Upgrade

The original kitchen faucet in our 2017 Lexor TS worked well but didn’t have have quite enough height in relation to the bottom of the sink.   We decided to replace it with a faucet that had a flexible neck.

The first step was to remove the old faucet.  This turned out to be the most difficult part of the project.  First I removed the drawers under the sink and could barely even see the mounting nut and plumbing connections.  I then removed the oven and could now access the mounting nut but still had almost no access to the plumbing connections.  The faucet had obviously been installed before the vent pipe that was blocking access.  I didn’t want to cut the vent pipe so I decided to use a 3.5″ hole saw from the oven side to widen the hole just enough to get proper access.  The bit on the saw had to be placed about a half inch below the opening to give the saw a place to center.  I also put a small piece of wood on the other side to keep the bit and saw from doing more than just cutting the hole.   The red circle in the image below shows the location that I widened.

The new faucet was easy to install with the parts that I’ve listed below.

Here are some of the items that I used on the project…..

RAF Flexible Faucet

24″ Faucet Connectors

Faucet Reducing Couplings

3.5″ Hole Saw