Carefree Freestyle Awning Control Improvements
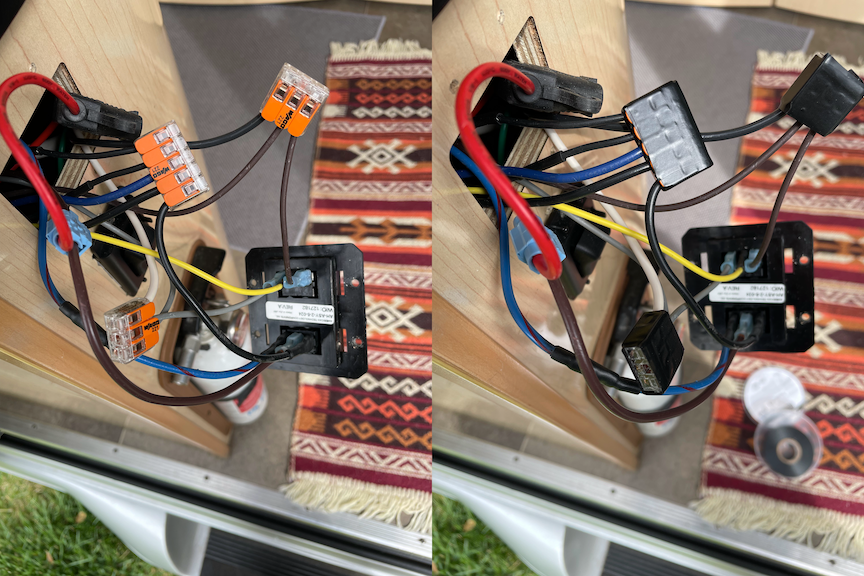
Awning Control Wiring with the New Switches in Place
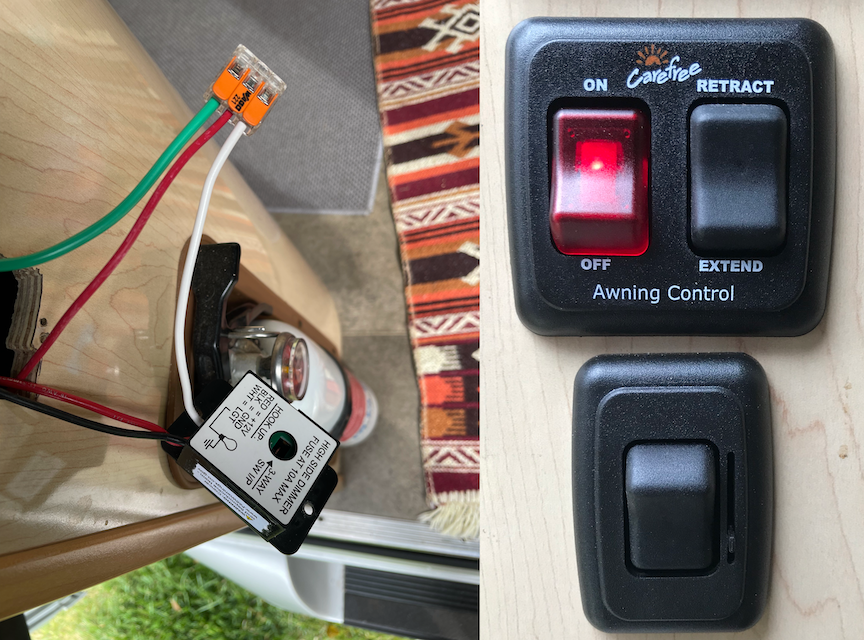
Awning Light Control Wiring with the New Dimmer Switch in Place
The stock Carefree Freestyle awning setup on our 2017 Lexor TS had a few items that we thought could use some improvement. The controls are positioned right next to the entry at the sliding door. This location is convenient but we find it to be a little too easy to inadvertently hit the switches while passing through the space. On a number of occasions our Beagle Cappi has even managed to flip one of the switches. We also found the awning lights to be too bright and the color temperature to be too cold.
I hopped on Amazon and started to hunt around for alternatives and found a few parts that I thought might help.
The first item was a lighted switch that could simply replace the stock on/off switch. This switch would turn a bright red when on to warn us that the awning power was enabled. The old switched popped right out of the housing and the new one popped right back in.
The second item was a switch with a dimmer that could replace the awning light switch. Installing this switch did require the stock hole to be widened just a bit. I took my time and accomplished this with a craft saw to avoid chipping the veneer.
The third item that I added was a flip up cover that protects the awning power and extend/retract buttons from being accidentally bumped in to. I ordered this cover directly from Carefree. This added protection provided a lot of peace of mind when I subsequently added awning supports.
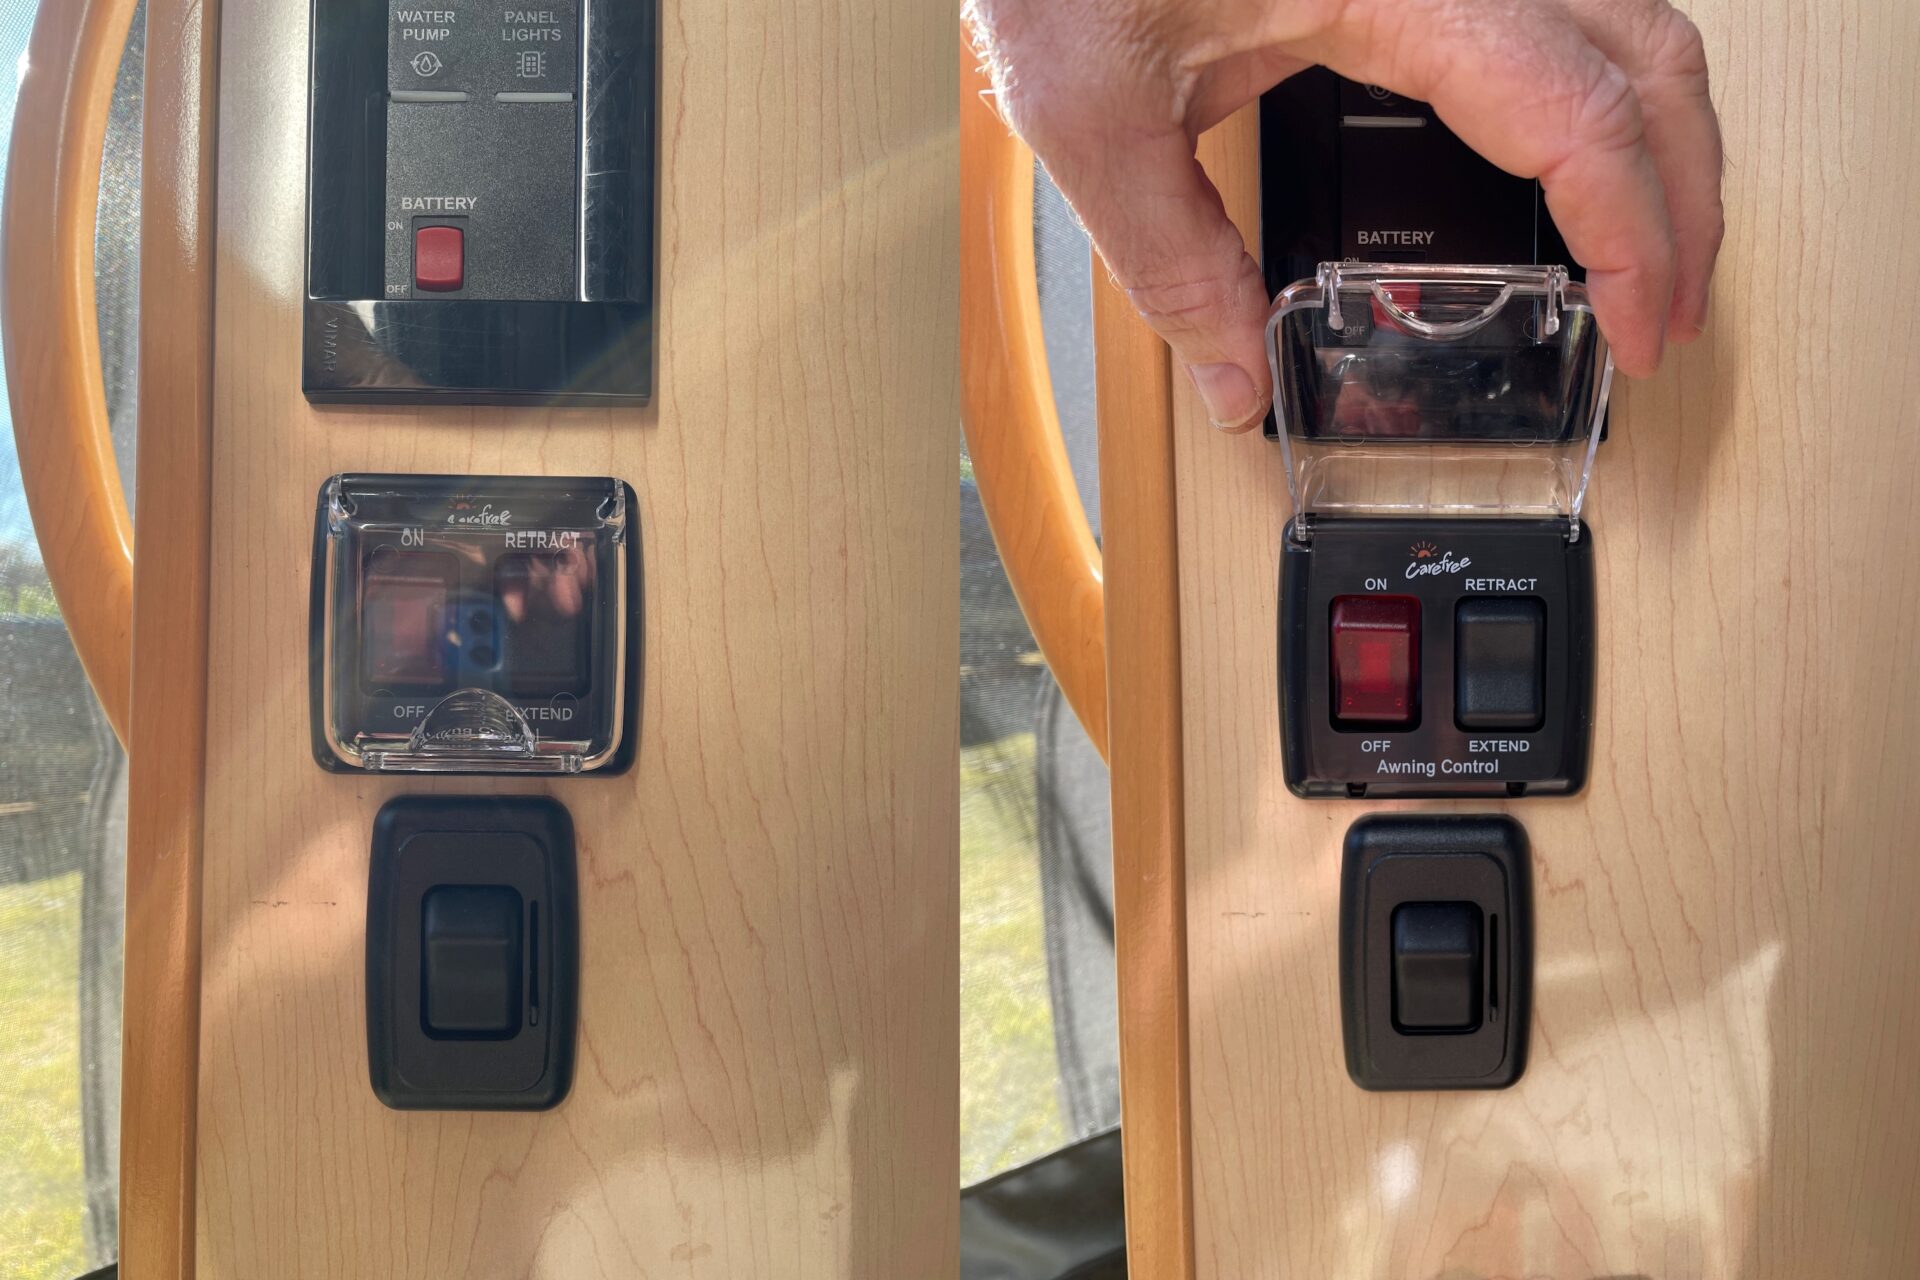
Awning Switches Protective Cover when Closed and Open
The last item was an adhesive backed LED light strip that was dimmable and had a warmer color temperature of 2700K. It was easy to disconnect the old LED light strip and pull it out of its channel. I cleaned the channel out with some rubbing alcohol and then inserted the new one. You’ll want to start from the connection end on the rear of the awning and work to the front. Any excess can be trimmed off with a pair of scissors at one of the clearly marked cut lines.
I also added the awning controls to the Coachproxy Automation setup that I’ve described in another article. To add them I did have to run a 14/3 wire from the Spyder board to the awning controls location. On our 2017 Lexor TS the path for the run was easy. The cable ran between the ottomans under the raised floor in the rear area and then along the existing wire under the oven and then up under the sink. One lead was connected to the “Extend” terminal on the awning switch and Spyder board terminal 22, One was connected to the “Retract” terminal on the awning switch and Spyder board terminal 23. The last was connected to the power terminal on the awning light dimmer switch. The on/off switch by the door has primary control and disables all power. It must be in the on position for the automation controls to work. The Coachproxy awning control also must be enabled before use and has a timer that disables it after 5 minutes to provide additional protection against unintended operation.
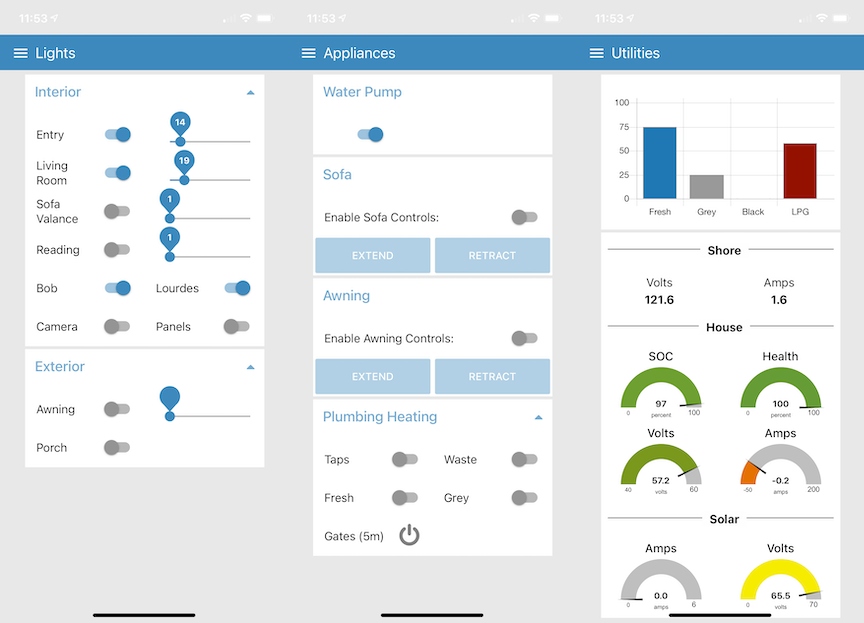
iPhone Screenshots of the Coachproxy Interface with Awning Controls
Here are some the items that I used for the project….
Carefree SR0115 Covered Bezel Kit
Awesome idea for the lighted awning rocker switch. It always bugged me that it was not always obvious if power on.
We have a 2018 Lexor and I have purchased the switch from Amazon.
Quick question – does the mounting face that holds the switches just pop out of the cabinet face (without fasteners from the backside) to give access to switch connectors ? I ask because the backside is nearly inaccessible and before I try to pry out the mount!
Many thanks,
Randy
Vancouver, Canada
Hi Randy,
It bugged me too! There is a cover on the front of the switch that pops off with light pressure applied to the seam where it touches the cabinet. Once that cover is off you will see the Robertson screws that need to be removed to release the panel and access the rear side.
Bob
Hey Bob
So I replaced the switch careful to follow the wiring in your photo above and now the on/off works normally but switch does not light up either in on or off position. I see there is a third post on new switch. Did you use this? Thanks again.
Randy
Hi Randy,
It looks like the photo is missing a wire. Thank you for pointing that out!
I just put an interim photo up. I’ll have to dismount the switch to get a final with the ground insulated. The proper connections are as follows. Connect the power to the bottom. Connect the awning to the middle and connect the ground to the top.
Bob
Thanks Bob. Can you please tell me where you grounded this swutch terminal?
Hi Randy, I just uploaded some new photos that I took this morning. In the first image you’ll see a blue wire and a black wire that are inserted in to the 5 position WAGO connector at positions 3 and 4 coming down from the top. Both of those are available grounds behind the switch. Please let me know if there is anything else I can do to help. Bob
[…] Awning Control Improvements […]