Adding Awning Supports to Our Carefree Freestyle Awning

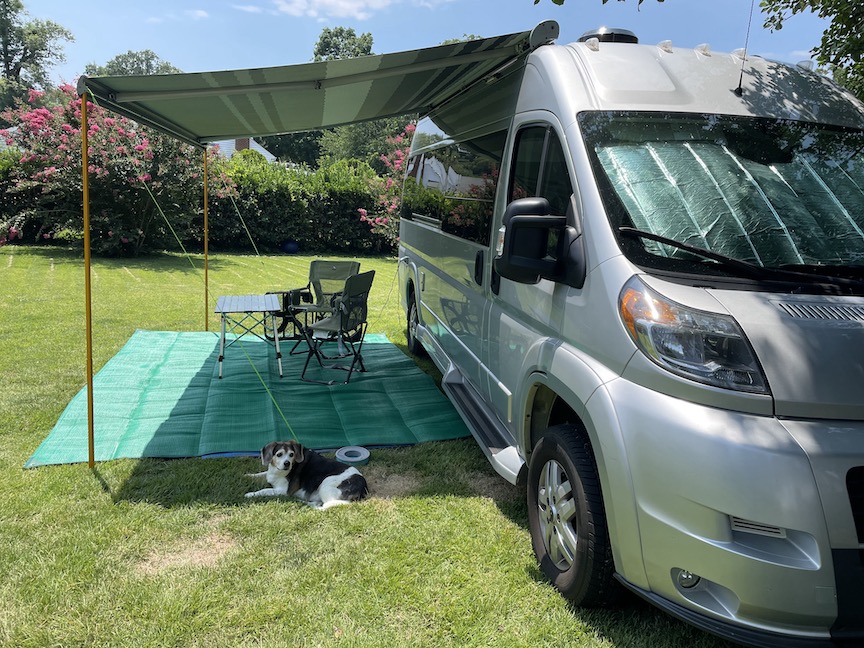
The Carefree Freestyle awning on our 2017 Pleasure-Way Lexor TS is very convenient to extend and retract. It’s nice to be able to get a little quick shade without any effort or having to deploy supports.
There are times, however, when that convenience becomes a liability. The wind can quickly become your enemy. The motion sensitive automatic retraction mechanism seems to be either too fast or too slow to do its job. I found a number of situations where I wanted more control.
Power Control
Having the ability to disable the power to the awning is very important is very important with this upgrade. You don’t want the awning to retract with the poles in place.
Our 2017 Pleasure-Way Lexor TS came equipped with three awning-related switches by the sliding door. The first switch retracts and extends the awning. The second is a power switch that disables the motor and wind sensor retraction mechanism. The third switch controls the awning lights.
In an earlier project I had swapped out the stock power button with a lighted button. It makes it easier to see when the power is on. I also replaced the awning light switch with one that included a dimmer. I also covered the awning extend/retract and power buttons with a flip up cover to avoid accidentally bumping in them. You may read more about that project by clicking here.
Support
The goal of this project was to provide support to the outer edge of the awning and prevent it from being pushed down or lifted up by the wind.
I had some trifold poles on hand that we used with the awning on our VW Camper. The poles adjust from 80 to 96 inches and break down to a length of 29 inches. Their height adjustment mechanism is a very solid pin and hole lock design which is more reliable than the twist or cam friction-based mechanisms. The poles we had were made by Kelty and don’t seem to be available at the moment. The ones at the link below from another vendor look almost identical. I’ve also seen similar poles at my local REI outlet.
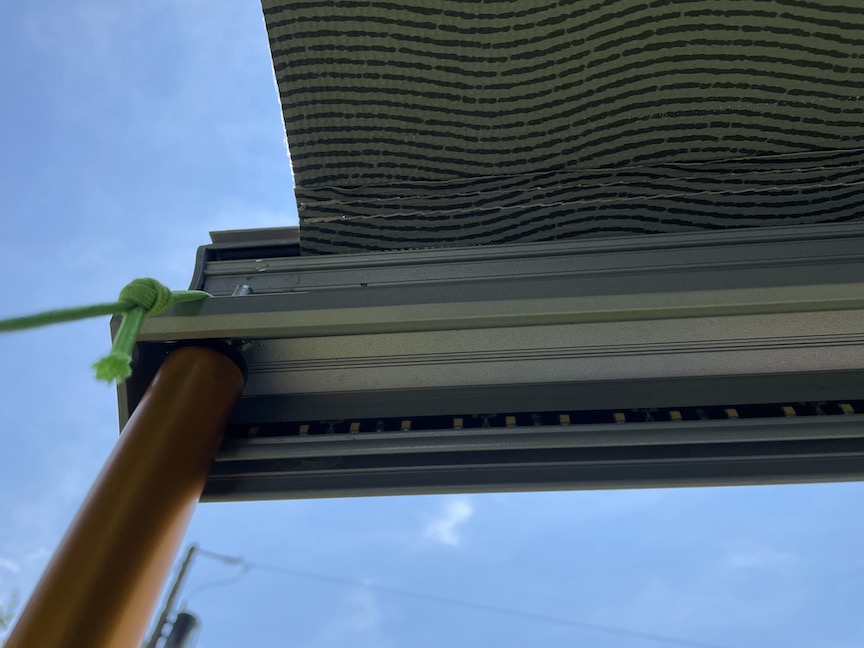
The poles each have a 2 inch long 1/4 inch pin at the top that is designed for use with the grommets found on tents and tarps. To take advantage of those posts I drilled (from the bottom up) a 3/8 inch hole located one inch from the edge on each end of the awning.

Bottom View of Tent Pole Installed in New Hole on Awning
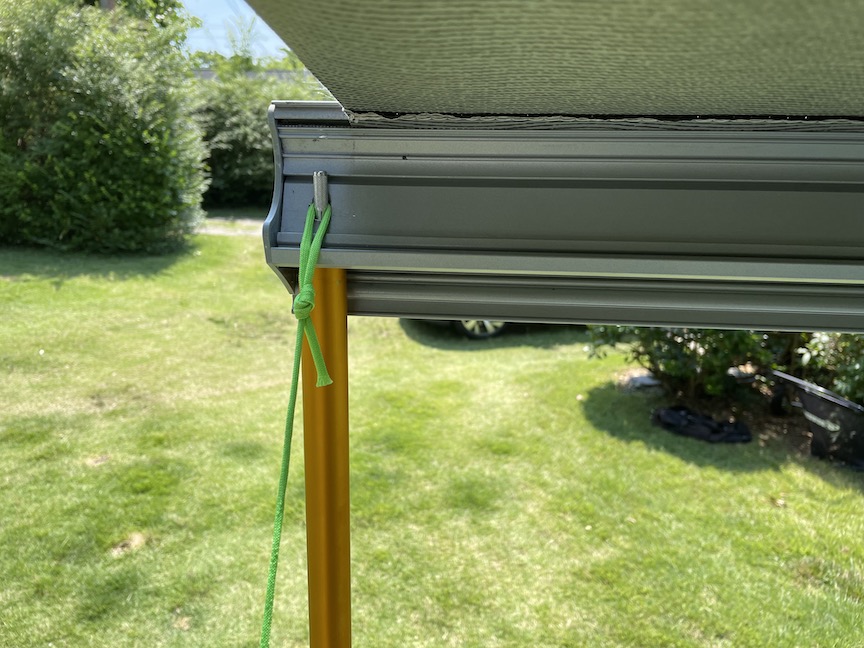
The pin at the top of the poles are inserted in the new holes and the poles are adjusted to the height required by the terrain. After adjusting the poles we then loop one end of a piece of parachute cord over the top of the pin and stake the other end of the cord to the ground and tighten it up with some guy line adjusters.

Top View of Tent Pole Installed in New Hole on Awning
The supports take just a few minutes to set up and tear down. The awning is very secure and we can now enjoy it’s shade along with a nice breeze too!

Good idea and very well described including the helpful photo.
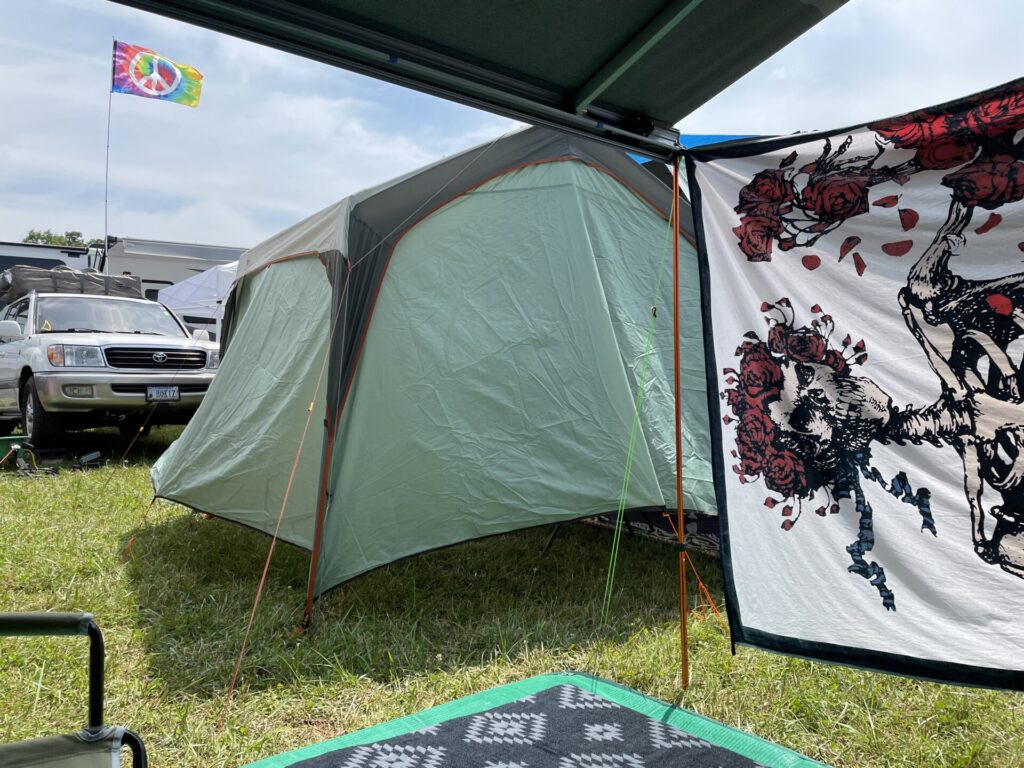
Thank you Ed. We just returned from a five day music festival and the awning was rock solid throughout despite a constant wind and one significant thunderstorm with strong gusts. Water did start pooling on the fabric at one point so I took a third pole and made a cross brace between the awning arms to lift the center area. It worked very well. I’ll be adding that info to the project article in the next few days.
Thanks Bob. The original manual fiamma awning g on my 98 excel call with a center support for the awning but never had yo use it fortunately. Im a fan of the old manual awnings with the poles.
I understand Ed. Our legless awning saw very sporadic use until I came up with this workaround. It was nice to just roll it out and leave it in place for 5 days. In the past it was a real dance to use it.
[…] The third item that I added was a flip up cover that protects the awning power and extend/retract buttons from being accidentally bumped in to. I ordered this cover directly from Carefree. This added protection provided a lot of peace of mind when I subsequently added awning supports. […]