AC Outlet Improvements
We’ve made a number of changes to the AC Outlets throughout our 2017 Pleasure-Way Lexor TS.
We began by installing a 15A GFCI/AFCI breaker in the breaker panel to protect the entire original “RECPT” circuit that is renamed as “OUTLETS” in the image below. All of the original wiring was retained.
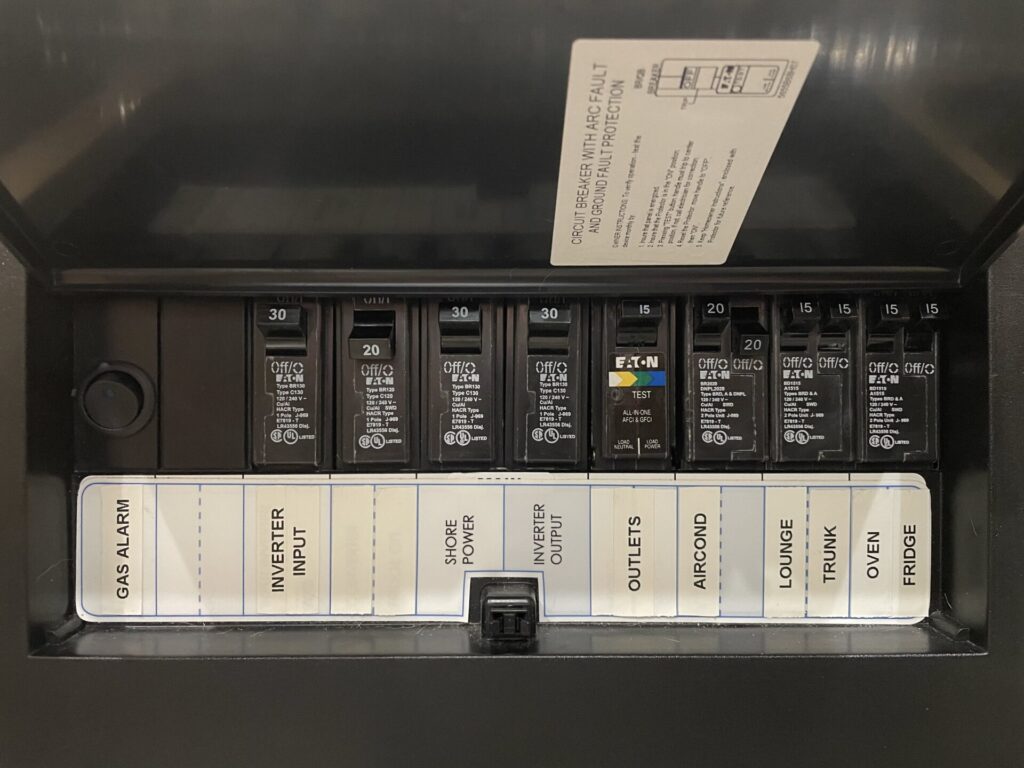
15A Eaton GFCI/AFCI breaker installed in breaker panel
We then replaced each of the original outlets with ones that included USB connections with an output of at least 2.1A on each port.
The original “Converter” outlet was renamed to “Trunk” and moved to the Inverter side of the AC breaker panel to provide more flexibility. The outlet was free to repurpose since we had removed the original 120V AC to 12V DC converter when we upgraded the house system to 48V.
We then added two new outlets to the configuration.
The first was installed in our new front lounge area. This location required that a new 12/2 Romex cable be run from the breaker panel. The cable was run through the floor of the Driver’s side ottoman. I used the hole that was originally used for the generator wiring. After removing the existing silicone sealant I found ample room to run the new cable and a sheath of protective split loom. The cable and loom were then routed along the driver’s side underneath the van and then in through a pre-existing hole in the engine firewall. The console was removed and a new hole was cut for a PVC “old work” box to protect the outlet. I chose an “old work” box to make it easier to perform future maintenance in the console area.
The second new outlet was placed on the rear of the kitchen pod. We had previously mounted a Nespresso coffee machine in the space behind the sink and the outlet made the power connection permanent. I selected the location for the new outlet to ensure that its protective box would not interfere with any plumbing and to keep it accessible but as far to the rear of the pod as possible. I then hand cut the hole using a coping saw blade to avoid any inadvertent damage. The location of the outlet left an open space on the rear of the pod that later came in very handy to store our perfect door mat.
Each of the changes has added some nice capability and made life on the road just a little easier!
Here are some of the items that I used on the project.
Leviton T5635-W USB Dual Type-C
Leviton T5635-G USB Dual Type-C
Bob, I see that you moved the GFI to the left end of the counter. I always assumed it had to be “upstream” of the other receptacles it protects. Is that not true or did you have to run a new feed wire and begin the string of receptacles at that location?
Hi David,
You are correct about the location of a GFI outlet to protect a series of outlets. The OEM setup had the outlets on four circuits that were labeled as Outlets, Converter, Refrigerator and Microwave. I decided to install GFCI breakers on each of my current outlet circuits (Front Lounge, Trunk, Outlets (interior and exterior), Refrigerator and Microwave). I also kept GFCI outlets on the Refrigerator, Microwave and in the wet areas (Kitchen and Bathroom).
Thank you for bringing the issue up as a question. I’ll update the article to point out the breakers and be more descriptive about the circuits.
Bob
Thanks Bob. I was able to find a GFI receptacle with USB outlets and installed that in place of the GFI receptacle on the driver’s side ottoman. Though I had to replace the original box with a deeper (3 1/2″) one so the receptacle and wiring would fit.
That sounds like a nice solution David. The GFCI/AFCI breaker that I used is at the link below. I’ll update the relevant articles soon to show their role in the circuits.
https://smile.amazon.com/gp/product/B086X9ZF3K
[…] the requirement to have GFCI on the first in circuit ottoman outlet. Doing so allowed us to install an outlet in that position that supports the charging of our USB […]